Checklist for AI-Driven WordPress Updates
Step-by-step checklist to prepare, test, and safely deploy AI-driven WordPress updates—backups, clear prompts, design, SEO, and verification.
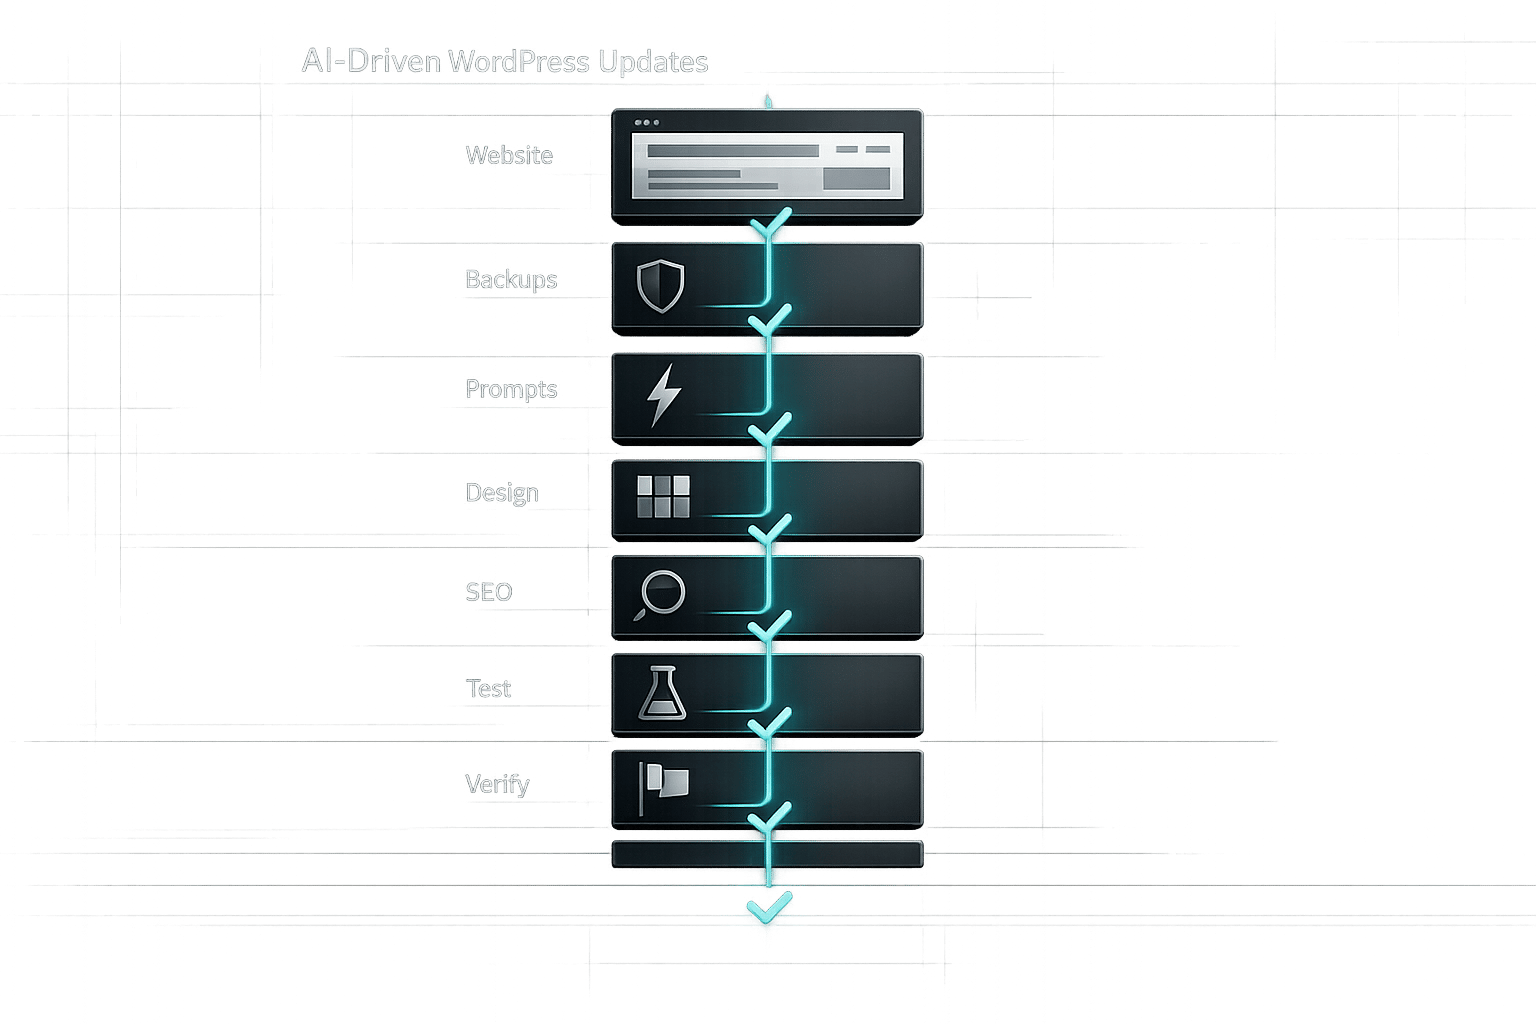
Checklist for AI-Driven WordPress Updates
Managing WordPress updates can be frustrating, especially when small tweaks require technical expertise. AI tools like Kintsu.ai simplify this process by letting you describe changes in plain English. From layout adjustments to SEO improvements, these tools handle updates quickly and securely. Here's a step-by-step guide to ensure your site is ready for AI-driven updates:
- Prepare Your Site: Organize headings, review Schema markup, and audit user permissions for security.
- Set Clear Goals: Be specific about changes, like targeting SEO or accessibility fixes.
- Back Up Everything: Create full backups of files and databases before making updates.
- Install AI Tools: Use plugins like Kintsu.ai for conversational updates; connect via secure API.
- Test Changes: Preview updates in a sandbox to avoid live site disruptions.
- Optimize Content: Use AI for rewriting, SEO, and accessibility improvements.
- Refine Design: Adjust layouts, menus, and performance with clear prompts.
- Verify Updates: Test across devices, track performance metrics, and maintain regular site audits.
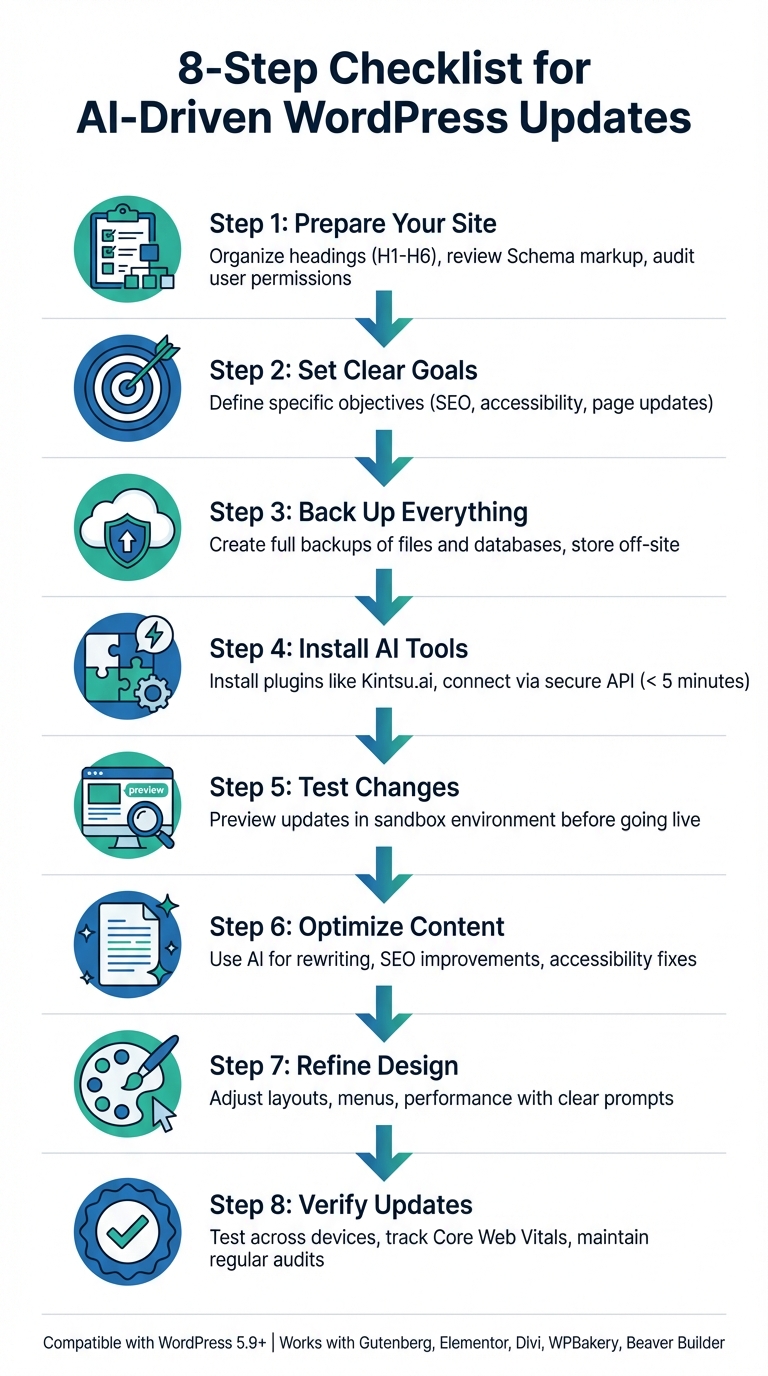
8-Step Checklist for AI-Driven WordPress Updates
WordPress AI Tutorial : Let AI manage your website
Preparing Your WordPress Site for AI Updates
To ensure your WordPress site is ready for AI-driven enhancements, start by organizing your site structure with proper heading hierarchies (H1–H6). This step helps AI tools understand your content layout. Next, review your Schema markup for elements like FAQs, products, and articles. These structured data points act as clear signals for AI systems about the purpose and content of your site. Before connecting any AI tools, it's also crucial to audit user accounts and permissions to minimize potential security risks.
Once your site’s structure and security are in place, focus on defining precise goals for any updates.
Set Clear Update Objectives
Having specific, well-defined objectives ensures that AI tools work effectively and safely. For example, you might target particular areas for improvement, such as enhancing SEO, updating outdated pages, or addressing accessibility issues like missing alt tags. Be as detailed as possible - state exactly what needs to change, such as "update only the pricing page FAQ" or "apply changes to the mobile layout." This precision helps avoid unintended alterations.
A case in point: In August 2025, a health blog utilized a GPT-powered tool with clear SEO-focused goals. The result? They doubled their publishing speed and saw a significant boost in organic traffic.
The more specific your objectives, the easier it is to assess whether AI-generated updates meet your expectations. As highlighted in the WordPress AI guidelines:
"AI tools can assist, but they are not contributors. If you submit a patch, you are responsible for understanding every line of code and documentation you submit"
Clearly defined goals also streamline the evaluation process, ensuring updates align with your standards.
Back Up Your Site Completely
Before making any changes, protect your site by creating a full backup. This includes both your WordPress database (covering posts, pages, and settings) and your files (themes, plugins, media, and core components). Store these backups in off-site locations, such as cloud storage or an external hard drive, separate from your server. WPBeginner’s editorial team emphasizes this point:
"You should never store your backups on the same server as your website. If your server fails, you would lose both your site and its backups"
Having backups of both the database and files ensures you can fully restore your site if something goes wrong. Use a reliable backup plugin or your hosting provider’s tools, and test the backup on a staging environment before applying any AI-driven updates. This extra step can save you from potential headaches down the road.
Setting Up Your AI Tool with WordPress
Once your site is backed up and ready to go, the next step is integrating an AI-powered tool to enable conversational updates. Tools like Kintsu.ai make this process straightforward with a plugin-based setup that doesn’t require advanced technical skills or server tweaks. The entire setup takes less than 5 minutes. Follow these steps to get your AI tool connected and running smoothly.
Install the AI Plugin
Start by signing up for a free account at Kintsu.ai. Once you’ve created your account, download the Kintsu AI plugin. To install it, follow the standard WordPress plugin upload process: click Install Now, and when the upload is complete, click Activate.
The plugin works with WordPress versions 5.9 and newer, including the latest 6.x updates. It’s also compatible with popular page builders like Gutenberg, Elementor, Divi, WPBakery, and Beaver Builder.
Before starting, double-check that your site uses HTTPS and that your security settings allow REST API communication. These are essential for the plugin to function correctly.
Connect via API Authentication
Once activated, the plugin generates a secure access key within your WordPress admin panel. Copy this key and paste it into your Kintsu AI dashboard to link the two platforms. Kintsu.ai explains:
"The plugin generates a secure access key that you enter in your Kintsu AI dashboard. After connection, you can immediately start making changes to your site through conversation."
All interactions between the plugin and your site use encrypted HTTPS connections. Importantly, your WordPress admin credentials are never stored. Instead, the plugin relies on standard WordPress REST APIs, ensuring compatibility with most hosting environments without requiring extra configurations.
Test the Connection
To confirm everything is set up correctly, run a quick test. For example, you can try a simple prompt like, "Update the homepage hero text", or conduct a read-only site audit. These tests verify that the AI has indexed your site’s structure and is ready to make changes.
When you request a change, the system generates a preview before applying anything live. This preview-first approach allows you to review and tweak updates in a secure sandbox environment before publishing.
If the connection doesn’t work or certain menus seem to be missing, clear your browser cache and ensure your user role has the required permissions to manage REST API settings.
Content Update Checklist
Once your site is prepared and tools are set up, the next step is updating your content. With your AI tool connected and tested, you're ready to dive in. The key to success lies in being precise about your changes and thoroughly reviewing the results before publishing. This checklist guides you through the critical steps to ensure your updates are high-quality and consistent.
Write Clear Update Prompts
The clarity of your instructions directly impacts the quality of AI-generated updates. Avoid vague directions and be as specific as possible. For example, instead of saying, "rewrite this", use something like, "Rewrite the About section to make it sound more approachable and conversational."
When working on sensitive areas like checkout pages or forms, include cautionary details in your prompt. For instance: "Update the WooCommerce checkout flow to include a gift message field without affecting existing payment functionality. Proceed with caution." This ensures the AI understands the scope and avoids unintended changes to critical components.
For more complex updates, start by asking the AI to analyze the content and provide recommendations in a read-only format. Once you have a clear prompt, carefully review the AI's output before implementing any changes.
Check AI-Generated Content
After the AI generates content, review every word with a critical eye before publishing. As the WordPress AI Guidelines remind us:
"Treat AI output like code from an unknown external contributor: you must review and validate it before sharing it".
Make sure the tone aligns with your brand’s voice, verify technical accuracy, and ensure the new content integrates smoothly with existing sections. If the tone feels too formal or too casual, refine your prompt and regenerate the output. Tools like Kintsu.ai allow you to preview changes in a sandbox environment, making it easy to fine-tune before going live.
If anything seems off, take a step-by-step approach to editing instead of accepting all changes at once.
Apply SEO Improvements
In addition to clear language, optimizing for SEO is crucial. AI tools can help refine title tags, meta descriptions, and heading structures without overloading content with keywords. For instance, you might direct the AI to: "Add the keyword 'WordPress security' to the H2 headings and meta description on the Security page."
When updating headings, consider framing them as questions followed by concise answers (40–60 words). This "answer-first" approach can increase your chances of landing featured snippets, which attract 42.9% of clicks.
Update Images and Media
Your media elements also benefit from AI enhancements. Use AI to generate descriptive alt text that clearly explains an image’s content - steer clear of generic labels like "image123.jpg." This improves both accessibility and SEO, as search engines increasingly interpret visual content.
Rename image files with descriptive, keyword-rich names (e.g., "wordpress-dashboard-tutorial.jpg"). Additionally, ask the AI to suggest where new visuals could improve engagement or recommend updates to multimedia elements. For example, you might replace a generic video thumbnail on your homepage with a product demo to better capture attention.
sbb-itb-42d7c06
Design and Functionality Update Checklist
Once your content is polished, it’s time to focus on your site’s design and functionality. Just as clear instructions guide content updates, simple commands can streamline design tweaks. With AI tools, you can transform your site’s look and feel using plain language prompts - no need to dive into CSS files or theme settings. For instance, you could say, “Make the hero section feel more premium” or “Add more spacing between sections,” and the AI will handle the technical details for you.
Modify Layouts and Styling
Start by targeting the most impactful areas, like the homepage hero section, navigation bar, or key conversion pages. Use specific prompts to ensure consistent styling across all devices while keeping the design responsive. For example, you could request: “Update the homepage hero to have a darker background and increase the heading font size by 20%.”
Tools like Kintsu.ai make it easy to adjust fonts, colors, spacing, and button styles without overloading your resources. If you spot inconsistencies, such as mismatched button styles, you can prompt the AI with something like: “Unify all call-to-action buttons to use the primary brand color with rounded corners.” Always preview changes in a sandbox environment before publishing to catch potential visual issues.
Update Menus and Navigation
Menus can also be updated with simple commands. For instance, you might say, “Move the Shop page to the top of the menu” or “Add Instagram and LinkedIn icons to the footer.” The AI will handle link updates, reordering, and ensure menus remain mobile-friendly.
After making these updates, double-check that all menu items link to the correct pages. If you’ve renamed a page or changed its URL, you can prompt, “Update the location of the Team link to /who-we-are.” For footer sections, the AI can also help tidy up cluttered content or add social media icons for smoother navigation across the site.
Once your design updates are in place, shift your attention to optimizing performance to ensure a seamless user experience.
Improve Site Performance
After implementing design changes, it’s crucial to check how they impact your site’s performance. Use prompts like, “Review homepage load times and recommend fixes,” to identify potential bottlenecks. The AI can suggest solutions such as deferring non-critical scripts, optimizing image loading, or replacing heavy widgets with more efficient alternatives.
Focus on CSS-based styling edits instead of adding extra plugins or scripts, which can slow down your site. Keep the design clean and consistent to avoid creating a patchwork effect that could lead to inefficient code. If performance metrics drop after an update, use the rollback feature to undo specific changes and experiment with lighter alternatives. This ensures your design improvements don’t compromise speed or user experience.
Verifying Updates and Ongoing Maintenance
Once you've implemented updates to your content and design, the next step is to ensure everything works smoothly across all platforms. This phase is crucial for catching potential issues before they affect your visitors, while also establishing a system for keeping your site running efficiently.
Test on Multiple Devices and Browsers
It's critical to test your updates on a variety of devices and browsers. With over 60% of internet users accessing the web via mobile devices, mobile optimization is a must. Keep in mind that browsers like Chrome, Safari, Firefox, and Edge handle elements differently, so cross-browser testing is equally important.
Tools like Chrome's Inspect feature and its device toggle option let you simulate how your site looks on popular mobile models. Check key features like navigation menus, form submissions, and image display to ensure they work seamlessly on smaller screens.
For more detailed checks, visual regression testing (VRT) can be a game-changer. By comparing "before" and "after" snapshots of your site, VRT highlights layout shifts and other unexpected changes. Platforms like Kintsu.ai even offer automated Visual QA tools to catch overlapping elements, contrast issues, and layout glitches.
Track Performance Metrics
Tracking the right metrics helps you determine whether your updates are actually improving the user experience. Pay close attention to Core Web Vitals: aim for an LCP under 2.5 seconds, a CLS below 0.1, and an FCP under 1.8 seconds. Use Application Performance Monitoring tools to spot sluggish plugins or slow database queries that may have been introduced with new updates.
Beyond speed, monitor user engagement metrics like bounce rates, average time on page, and scroll depth. These indicators show whether visitors are interacting with your updated content. For SEO, check metrics such as click-through rates (CTR), keyword rankings, and technical issues like 404 errors on a weekly basis. If you're using AI-generated content, ensure schema markup for FAQs, articles, or reviews displays correctly in search results.
Set Up Regular Maintenance
Before pushing AI-driven changes live, always review them in a staging environment. This practice minimizes disruptions and allows you to catch errors early. Keep a detailed audit trail of edits, noting what was changed, where, and why. This way, you can easily restore previous versions if something goes wrong.
Make regular site audits part of your routine. Schedule prompts for the AI to conduct "full system reviews" to identify misplaced code, structural issues, or broken logic. Use automated tools like WPScan to detect vulnerabilities in new plugins or themes. Granular rollback features are especially helpful here, allowing you to reverse individual changes without impacting the entire site.
Common Problems and How to Fix Them
Here are some common issues you might encounter and how to address them effectively using Kintsu.ai prompts.
| Pitfall | Symptoms | Fix with Kintsu.ai Prompt | Prevention Tip |
|---|---|---|---|
| Authentication Failure | "Invalid Access Key" or connection timeout. | In Chat Mode: "Provide your server specs: [Details] and ask, 'What should my host unblock?'" | Make sure HTTPS is enabled and confirm the REST API is active in Site Health. |
| Plugin Conflict | White screen or broken UI after an AI update. | "From this plugin list: [List], which ones are likely to conflict with a new [Feature Name] and why?" | Use the Sandbox feature to test changes before applying them live. |
Conclusion
The checklist above gives you the tools to handle AI-driven updates confidently. Updating your WordPress site with AI can be a smooth and secure process. By sticking to a structured approach - like backing up your site, setting clear goals, and testing changes on different devices - you can turn what might feel overwhelming into a manageable routine. The secret lies in improving your current site rather than starting over from scratch.
"Our philosophy: Don't rebuild. Refine." - Kintsu.ai
Previewing updates first ensures that every change meets your standards, and Kintsu.ai makes this process easier. With features like smart guardrails to flag risky changes, built-in plugin conflict detection, and version control for rolling back specific edits, you stay in control while benefiting from AI's speed and precision. Kintsu.ai shows that making steady, incremental updates often works better than risky, large-scale overhauls.
Users who succeed with this approach document their changes, keep detailed audit trails, and regularly review their sites to catch potential issues early. Whether you're managing minor tweaks or larger updates, proper preparation helps you avoid downtime and maintain functionality.
Start with small updates, test everything carefully, and build your confidence step by step. This way, your WordPress site stays up-to-date, optimized, and reliable - without the stress of unexpected problems or last-minute fixes. Keep refining your workflow to stay ahead.
FAQs
What should I back up before AI updates?
Before diving into AI-powered updates for your WordPress site, make sure to back up all essential data. This means saving everything - your website's content, themes, plugins, media files, and the database that holds posts, pages, and settings. A complete backup acts as a safety net, allowing you to restore your site if anything goes wrong.
How do I write safe prompts for AI changes?
To ensure safe prompts for AI-driven updates, focus on clear and specific instructions. Before implementing changes on a live site, always test them in a staging environment. For complex updates, implement safeguards to reduce the chance of errors. Additionally, keep a record of your prompts and refine them through debugging when necessary. This approach helps maintain accuracy, security, and reduces potential risks in AI-driven changes.
How can I test AI updates before going live?
To safely test AI updates before applying them to your live WordPress site, use a staging or sandbox environment. This setup allows you to review changes thoroughly, ensuring your site's features work correctly and that no errors arise. By testing in this controlled space, you can catch potential issues caused by the updates without risking disruptions on your live site.